This is a belated post on the third batch of pineapple tarts we made over the CNY period.
We tweaked the earlier recipes and this is like an in-between version. Not too buttery like part II and not too tough like part I.
430g flour
20g corn flour
250g butter (cold, cut into smaller pieces)
3 tbsp icing sugar
1 tsp salt
1 tsp vanilla essence
3 egg yolks
3 tbsp water
Pineapple jam from Bake King
Glaze from egg yolks + water
Using the rub-in method (flours, icing sugar, salt)
Then the liquids
Chill dough in fridge before using
Oven : 160 degrees for 20min
Showing posts with label bake. Show all posts
Wednesday, March 27, 2013
Saturday, January 19, 2013
Pineapple tarts (work in progress 2)
This recipe gives a nice, airy tart base - much liked and sought after by some, but I would prefer something slightly harder. The trick is to rub in the butter to flour, rather than creaming the butter and eggs.
The buttery dough gets soft fast and thus hard to work with. Chilling it for at least an hour and having plenty of flour on hand for the work surface helps.
We found that rolling the store-bought pineapple jam early and letting them sit out at room temperature for an hour or so yields soft pineapple toppings even after twenty min in the oven! Another tip I read online to keeping the jam balls moist is to roll them with clean wet hands.
I also found that if you want to add a little design or flower to top the tarts, it would be better to use a drier potion of dough (or you can let it dry out a little or simply add more flour), punch out the flower pieces early and let them dry out at room temperature. This makes then easier to handle.
Below is the recipe we used, with comments for adjustments that I want to make in our next attempt.
450g flour
50g cornflour (might skip this and use 50g flour instead)
280g butter (might need to reduce to 250g)
Half tsp salt
6 tbsp icing sugar
1 tsp vanilla essence + 3 egg yolks + 3 tbsp water
Glaze : 1 egg yolk + 1 tbsp water
160 degrees, 20 min
Yields 99 tarts, with 500g pineapple jam.
Saturday, January 12, 2013
Pineapple tarts (work in progress)
Our first try!
Needs some tweaking though.
Pineapple jam/paste (we used Bake King)
500g flour
1 tsp baking powder
2 egg yolks
1 egg white
250g butter
1 tsp vanilla essence
180 degrees for 15 to 20 min.
Some tweaking needed :
Pineapple jam was dry
Need some salt in dough
Need to brush the tarts over with egg
Perhaps more butter
Saturday, December 29, 2012
Bread and butter pudding
about 4 slices of bread, cut up into large triangles
400ml milk
4 eggs
120g sugar
raisins
butter (to grease the baking dish)
vanilla essence, a few drops
icing sugar to finish
Butter the baking dish. Sprinkle raisins
Arrange the bread.
In a bowl, whisk egg, milk, sugar and vanilla essence
Slowly pour mixture onto the bread
Fill up to 3/4 of dish.
Add raisins
Place dish into a shallow tray with water
Bake at 180 degrees for 45 min
Cornflake clusters
Cornflakes 200gm
Honey 1 tbsp
Butter 2 to 3 oz
Sugar 45gm
1. Boil honey, butter, sugar till thick and foamy
2. Remove from heat, add crushed cornflakes
3. Drop into small paper cases. Bake at 160 degrees, 10-15 min
4. Cool before storing in an airtight container
Honey 1 tbsp
Butter 2 to 3 oz
Sugar 45gm
1. Boil honey, butter, sugar till thick and foamy
2. Remove from heat, add crushed cornflakes
3. Drop into small paper cases. Bake at 160 degrees, 10-15 min
4. Cool before storing in an airtight container
Sunday, September 2, 2012
Baked spaghetti
adapted from a recipe from cbeebies' I Can Cook tv programme for preschoolers!
Serves 2 adults, 2 children.
300g of spaghetti, break into appropriate size for the oven-proof dish.
600ml water
Spaghetti sauce ( about a small prego bottle's worth)
Chicken pieces
Mushroom pieces
Clams
Remember to cover the dish or the spaghetti will dry out
210 degree celsius, 25 min for fan-forced oven
Cheese to top off before serving
Monday, June 18, 2012
Face cookies
(A) Cream these,
- 200g butter
- 160g castor sugar
- 40g brown sugar
(B) To add,
- 1 egg yolk
- orange zest from one orange
- 1tbs orange juice
- 80g Nestum
- 250g flour and 1/4 tsp baking soda (sieve together)
Decoration:
- chewy strings
- m&m
- sprinkles
Method:
1. Cream (A)
2. Add (B) into (A)
3. Rest for 10min and roll out to cut out shape with cookie cutter
4. Decorate
5. Bake at 180 Degree Celsius for 25-30min
6. Cool well before storing
Sunday, June 17, 2012
Scary cupcakes
Wednesday, May 30, 2012
Peach Teacake
I rarely get in the mood for baking as I find it quite labourious - precise measurements on the ingredients, followed by washing up.
My recipe is modified from the Sheila's Pudding recipe found in Jamie Oliver's The Naked Chef Takes Off. Mine isn't heavy like a pudding, and is more like a cake.
The ingredients :

- 1 can of peaches
- 1/2 cup sugar**
- 1 cup self-rising flour
- 1/2 tsp vanilla essence
- 2 eggs
- 150 g butter (unsalted)
**you can lessen the sugar amount and add in some syrup leftover from the canned peaches, and in which case, you should add a little more flour
- Grease the baking pan with some butter, and dust with some flour. Lay the peach halves into the pan
- Add the flour (sift it)
- Bake at 180 degree celsius for 45 mins . The pretty patterns on the surface are due to lesser batter that sit over where the peaches are, so if you want your cake to look pretty, arrange the peach halves well in the pan first
- Remove from oven, and serve with hot custard or something cold, like vanilla ice-cream
- Burp!
Wait! If you still have some syrup left from the canned peaches, use it in place of sugar for your morning or afternoon tea. Mmmmmmmmmm ...
Hotcakes and scones
How about some hotcakes to start off your day? mmm... Morinaga hotcake mix from Japan - I heard it was cheaper back in Japan - each pack carries four 200g sachets. Each sachet is sufficient to make several hotcakes.

Morinaga had this *cool* video that shows you how to make and flip the pancakes - I'm not sure if it's still there. It was still quite a thrill even if you dont understand Japanese. Have fun cracking the egg open and pouring the milk in, and also flip through the pages of the 'book' in the video. There's a story weaved in, but I havent quite figured it out yet. Go to the Morinaga website, and tinker around.
I was quite amazed when Ollie shared with me that hotcake mix can be used to make more than just hotcakes, as this recipe book would tell you too. Nevertheless, I did try a Scone recipe that she shared with me sometime back. I didn't have my digicam so there're no pics, but here's the recipe. Oh, and I haven't made any hotcakes yet.
Plain Scones (from hotcake mix)
*use just your fingertips as they are the coolest part of your hands
**there's no need for too much flour as I learnt

Morinaga had this *cool* video that shows you how to make and flip the pancakes - I'm not sure if it's still there. It was still quite a thrill even if you dont understand Japanese. Have fun cracking the egg open and pouring the milk in, and also flip through the pages of the 'book' in the video. There's a story weaved in, but I havent quite figured it out yet. Go to the Morinaga website, and tinker around.
I was quite amazed when Ollie shared with me that hotcake mix can be used to make more than just hotcakes, as this recipe book would tell you too. Nevertheless, I did try a Scone recipe that she shared with me sometime back. I didn't have my digicam so there're no pics, but here's the recipe. Oh, and I haven't made any hotcakes yet.
Plain Scones (from hotcake mix)
- 200g Morinaga hotcake mix
- 50g butter (unsalted)
- 1 egg
- 1 tbsp milk
- Preheat oven to 170 degrees
- Rub* butter and hotcake mix till texture is crumbly
- Mix milk into egg
- Make a well in the bowl of rubbed flour+butter n pour in liquids
- Mix into a dough
- Wrap dough in a cling wrap and place in the fridge for at least 30mins
- Remove dough from fridge
- Dust a little plain flour on tabletop
- Roll out the dough on this surface (you can use your palm) (dough still in cling wrap)
- Roll to thickness of 2cm
- And cut out using cookie cutters
- Dust baking tray with flour** (no need to grease)
- Place the cut-out dough pieces some distance apart on the baking tray
- Bake for 15mins
- Enjoy the scones fresh from the oven, with berry jam, cream, tea or coffee!
*use just your fingertips as they are the coolest part of your hands
**there's no need for too much flour as I learnt
Serious orange cake
I chanced upon this cake recipe which Chubby Hubby had taken from Damien Pignolet's Serious Orange Cake recipe in his cookbook French.
The recipe called for the ingredients to be measured out by weight. I didn't have a kitchen scale then, and thus spent a good part of one night trying to figure out how to measure the ingredients out using a 250 ml cup.
Here's the recipe, with my own notes in blue and at the bottom of this post. I didnt have all the ingredients, and thus made some minor adjustments here and there.
This cake is good ! Serious ! Citrusy, bitter-sweet, moist. I think I could have added more alcohol than the recipe called for.
Serious Orange Cake
- 1 orange*, weighing around 150g, washed well and diced, pips removed
- 200g sugar (or 4/5 cup of sugar)
- 3 eggs
- 150g self-raising flour, sifted (or 1 cup + 3 tbsp of flour)
- a small pinch of salt
- 180g butter, melted and cooled a little
- 60ml orange juice (roughly the juice yielded from 1 other orange)
- 1 tablespoon lemon juice**
- 1 tablespoon caster sugar
- 1-2 tablespoons Cointreau***
- Preheat the oven to 170ºC.
- Grease and line a 24cm diameter springform cake tin**** with baking paper.
- Place the diced orange in the bowl of a food processor# with the sugar and process until very smooth.
- Add the eggs one at a time, mixing well between additions.
- Add the flour and salt and combine for 30 seconds.
- With the machine running, add the butter all at once.
- Transfer to the prepared tin and bake for 35-40 minutes****; test for doneness by inserting a bamboo skewer--it should emerge clean and dry.
- While the cake is cooking, make the orange syrup. In a small saucepan, combine the orange and lemon juices and the sugar. Bring to the boil, stirring to dissolve the sugar, and simmer for 1-2 minutes. Add the Cointreau to taste and simmer for 1 minute more.
- When the cake is ready, remove from the oven but leave in the tin to cool for 5-10 minutes.
- Use a bamboo skewer to pierce the cake all over, then slowly spoon the syrup over the cake and leave until completely cool before turning out.
* use the whole orange, including the skin (this gives the cake the slight bitter tangy flavour)
** I didnt have lemons, so I skipped this
*** I didnt have Cointreau, and used 2 tbsp Bacardi Dark Rum in its place.
**** I used a 21 cm baking tin (non-springform, i.e. the normal kind), and since the tin is smaller (meaning the ingredients are less spread out), I baked the cake longer - for 50 mins. I think you can try up to 55 mins too if you care to watch over the oven.
# I used a hand-blender, as the bowl for food processor is too small to hold all the ingredients. With the hand-blender, I could blend the ingredients in a oversized bowl.
Chocolate muffin (basic)
Made these on the spur of the moment one lazy afternoon. I was browsing through my kitchen store, and after a quick check on the internet, I rehashed some basic recipes and came up with this for chocolate flavoured cupcakes.
Here’s the recipe:
Choco Cupcakes (basic)
- 1 cup self-raising flour
- 125g butter (softened)
- 1/2 cup sugar
- 2 eggs
- 2 tbsp milk, plus a little more splash of milk if needed
- 1/2 tsp vanilla essence
- 1 tbsp cocoa powder + 1/2 a pack of instant coffee powder
- 2/3 chocolate chips
- Preheat oven to 200 degrees
- Place all ingredients into a food processor (except for the milk & chips), and pulse to ensure mixture is even. Add milk towards the end, and pulse a little more
- Pour into 12 cupcake cases (or 8 large muffin cases), and bake for 15 mins
- Done !
Chocolate brownie muffin
I've not really put my new oven to the real test. It came with my new home, and I was doubtful about its quality since it was not something I chose. The oven comes with a blow-fan feature which I am unfamiliar with, and I only know, with Ollie's advice, that baking-times need to be reduced for such ovens.
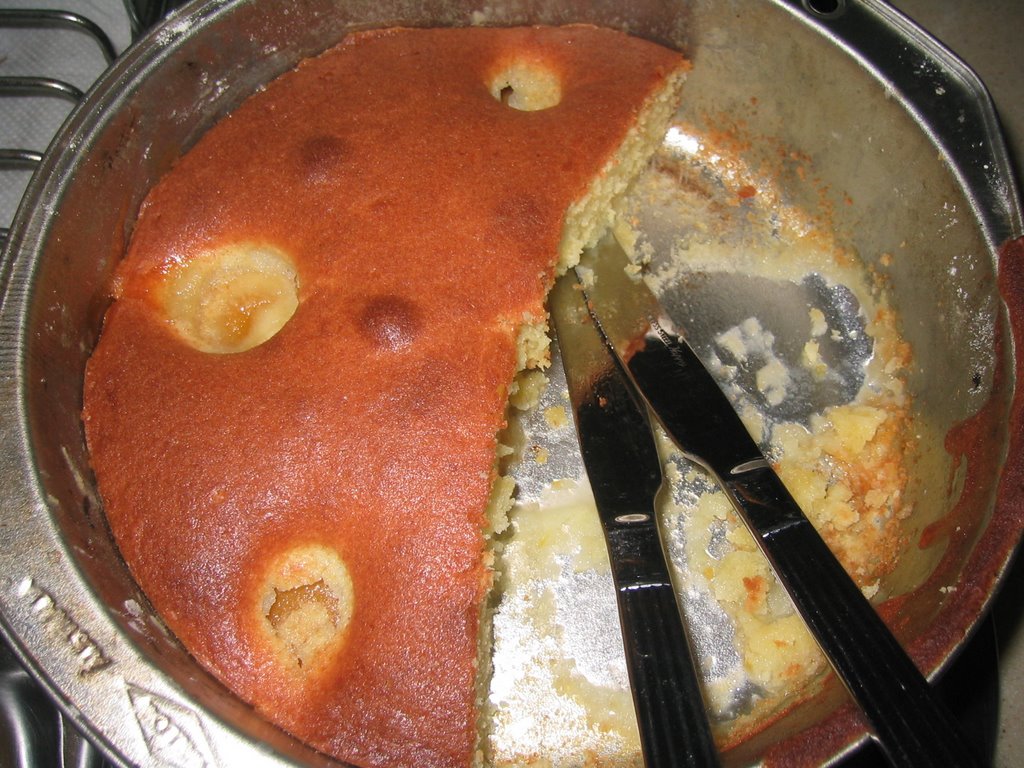
True enough, I overdid my first set of bakes with the oven - cornflake cookies over the CNY period
:(
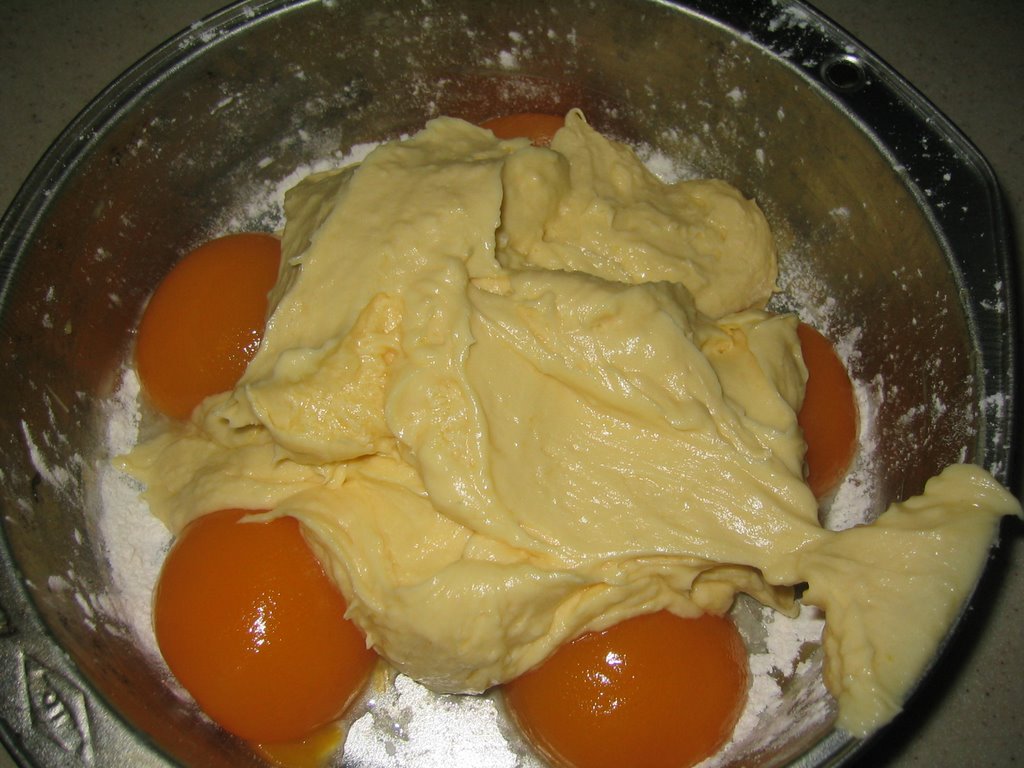
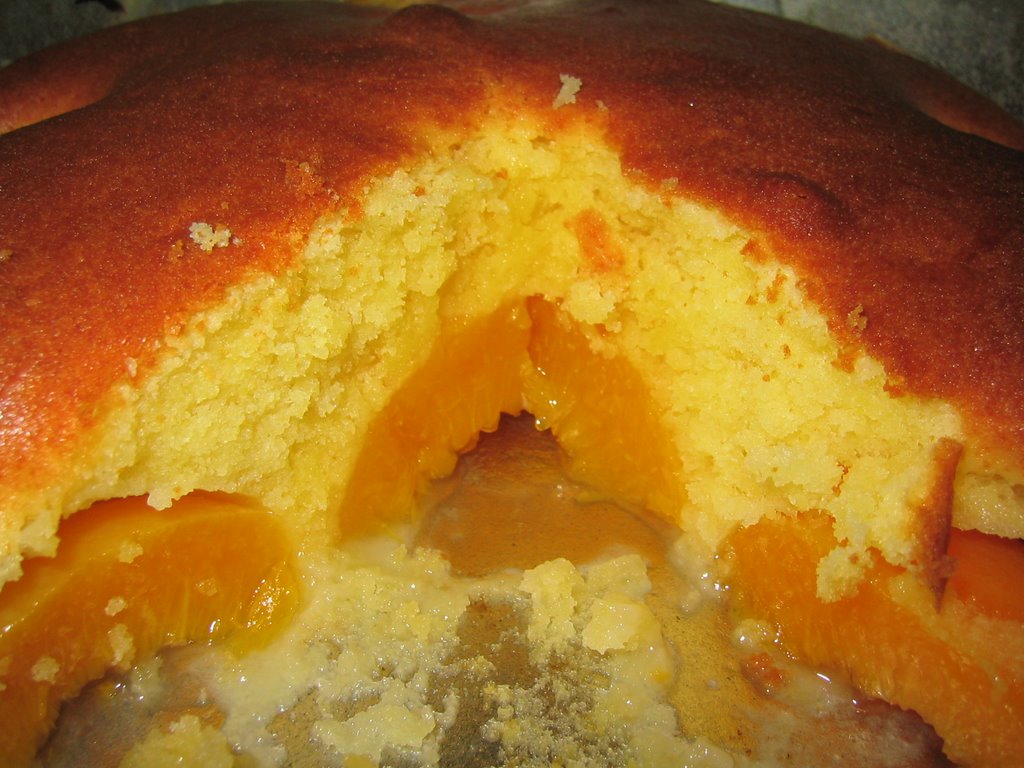
I finally mustered up enough enthusiasm and excitement to make some chocolate brownie muffin. I had been trying to get hold of recipes that could yield rich, fudgy choco muffins, much like those from my favourite bake-shop in Shunfu.
I adapted the following from Happy Home Baking, whose blog I have been following.
I used lesser cocoa powder, brown sugar (instead of white) and also used smaller cupcases.
The result? - Yummy, rich and these are actually really brownies. Wonder what a pinch of baking powder might do...?
Ingredients
80g butter
150g dark eating chocolate, chopped
100g brown sugar
(melt the above 3 items over indirect heat)
2 eggs, lightly beaten
1 teaspoon vanilla essence
100g plain flour
1 tsp cocoa powder
A handful of chocolate chips
Method
Preheat oven to 200 degC.
Line baking tray with cupcases.
Sift together flour and cocoa powder, set aside.
Melt butter, sugar and chocolate over indirect heat.
Transfer chocolate mixture to a mixing bowl.
Stir in the liquids gradually (eggs, vanilla essence), followed by the flour+cocoa powder+choc chips mixture.
Stir till just incorporated (do not overstir).
Divide batter into muffin cups.
Bake for 15 mins or until skewer inserted in the centre comes out clean.
Cheese baked rice
Cheese baked rice in the making. topping up in layers - bottom layer - garlic-buttered rice - next - spaghetti sauce with minced meat & mushroom - next - japanese mayo - finally - cheddar cheese and mozarella Remember the tabasco sauce for spicy tanginess! |
Tuesday, May 29, 2012
Lemon lime muffin
Ingredients
1 cup butter, softened or melted
1.5 cups granulated sugar
4 eggs
2 tsp lemon extract
1 cup plain yogurt
2.5 cups flour
1.5 tsp baking powder
1 tsp salt
1/2 cup lime juice
2 tsp lemon or lime peel, grated
Additional sugar and 1/4 cup lime juice
Method
- Cream butter and sugar together until smooth
- Add eggs and beat well
- Add lemon extract and mix well
- Sift together flour, baking powder and salt
- Add this alternately with lime juice, mixing thoroughly after each addition
- Mix in the grated peel
- Fold in the yogurt
- Fill muffin cups about 3/4 full and bake at 180degrees for about 15min or until a wooden pick comes out clean
- Cool for about 15min, then dip in lime juice and granulated sugar
Sunday, May 27, 2012
Seafood Gratin
![]() |
Aren't ramekin dishes cute? |
This is a relatively simple dish to make.
Ingredients
- 200g squid, cut into rings
- 200g salmon fillet, cut into chunks
- 8 medium prawns, leave tail on
- freshly ground pepper
- 120g mayonnaise
- 2 tbsp dijon mustard
- 5 tbs panko crumbs, divided
- 2-3 stalks of flat leaf parsley
Method
- Preheat oven to grill mode. Set the rack as close to the top as possible
- Pat the seafood very dry
- In a bowl, add seafood and pepper. Mix well. Set aside
- Mix mayonnaise and mustard. Set aside
- Line a shallow baking tray with aluminium foil (to catch the drips when the gratin overflows)
- Have ready gratin dishes (4 small ones, or 2 medium sized ones)
- Divide 2tbsp of the panko crumbs into the dishes
- Mix half the mayonnaise mixture with the seafood. Divide the seafood into the dishes (the prawns should go on top).
- Spoon the rest of the mayonnaise mixture over the seafood. Sprinkle the remaining panko crumbs over.
- Place dishes into oven. After 3 minutes, rotate the dishes and cook another 2-3 min
- Remove from oven and let rest for 3min
- Sprinkle with parsley
Subscribe to:
Posts (Atom)